
Saving and Reusing the Card after Swiping
You can Save and reuse the Card after swiping by following the below Sample Workflow.
In CR2 > Account module > tag a Company [Apple Computers]
Create a Rental Reservation Order [ORD-005]. Search and Add the Item [APPLE SPKR].
Select the Actions menu > Pay Advance option. The Payment window is displayed.
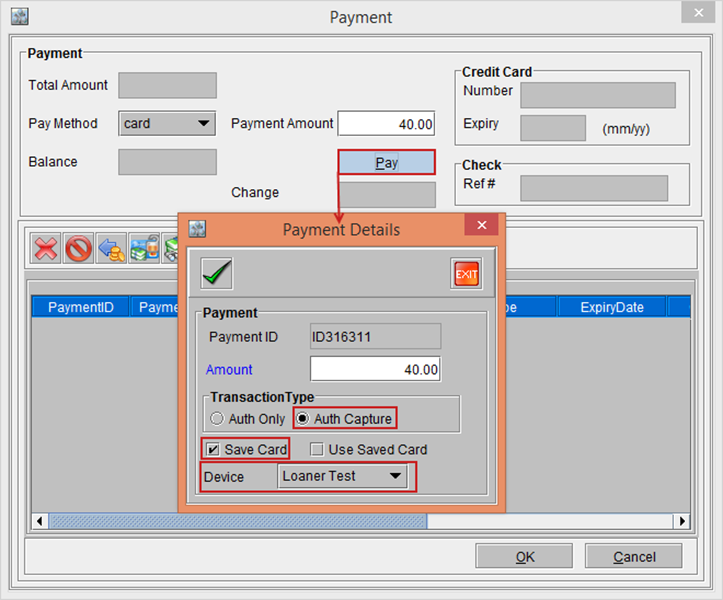
Select the Pay Method drop-down as card and enter the Payment Amount [40.00] and click the Pay button, as shown in Figure 8.1.
The Payment Details window is displayed comprising of the Payment section and the Transaction Type section, as shown in Figure 8.1.
The Payment section displays with the Payment ID [ID316311] and Amount [40.00].
In the Transaction Type section select the default Auth Capture radio button, Save Card check box and the Device drop-down as Loaner Test, as shown in Figure 12.0.
Figure 12.0 Payment Details window
In the Payment Details window, click the OK button. The system displays a prompt with the message "Payment in Progress. Please wait"
Observe the Device [Loaner Test] selected. It will prompt you to Swipe the Card and sign.
Swipe the Card and do the signature and press Enter key on the Device.
On successful payment, the system displays a prompt with the Payment Successful & Card Information is Saved message.
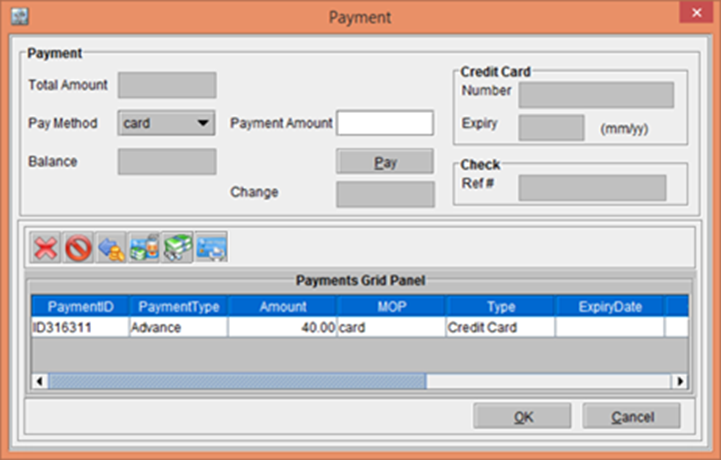
Click OK. The Transaction gets included in the Payment window, as shown in the Figure 12.1.
Figure 12.1 Transaction included in the Payment window
Click OK in the Payment window.
In the Order [ORD-005], select the Actions menu > Pay Advance option. The Payment window is displayed.
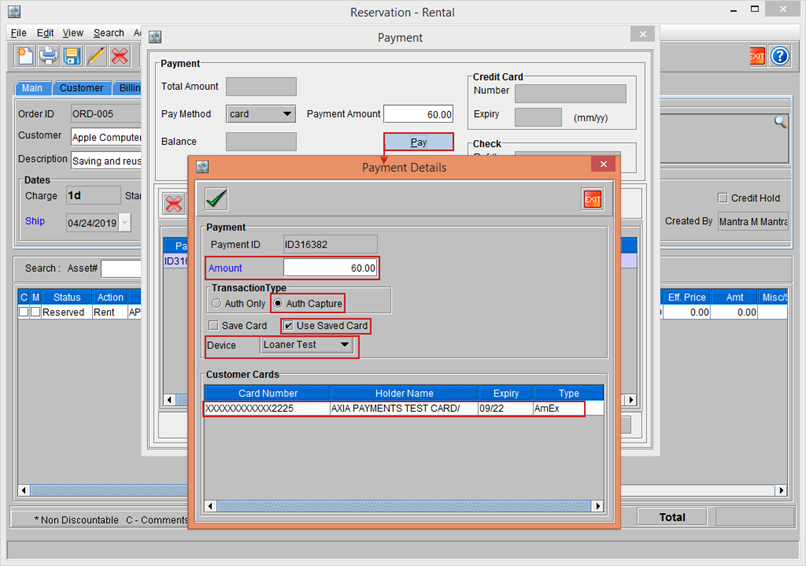
Select the Pay Method drop-down as card and enter the Payment Amount [60.00] and click the Pay button, as shown in Figure 8.5.
The Payment Details window is displayed comprising of the Payment section and the Transaction Type section, as shown in Figure 8.5.
The Payment section displays with the Payment ID [ID316382] and Amount [60.00].
In the Transaction Type section select the default Auth Capture radio button, Use Saved Card check box and the Device drop-down as Loaner Test, as shown in Figure 8.5.
The Payment Details window animates to expand and show the Customer Cards grid comprising of all the Saved Cards, as shown in Figure 12.3.
Figure 12.3 Payment Details window
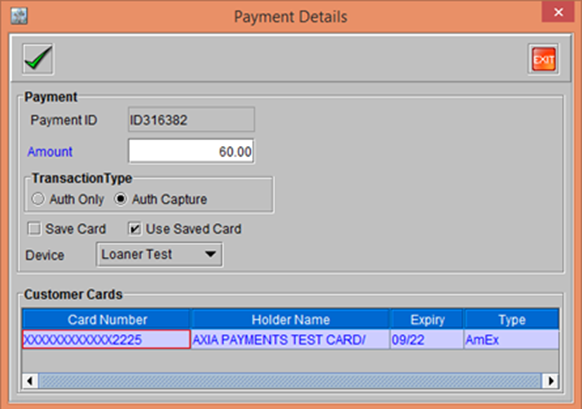
From the list of cards that are shown, Double-click to select the desired card for the payment. The selected card’s details get tagged and is displayed in blue color, as shown in Figure 12.4.
Figure 12.4 Saved Card Tagged in the Payment Details window
On successful payment, the system displays a prompt with the Payment Successful! message.
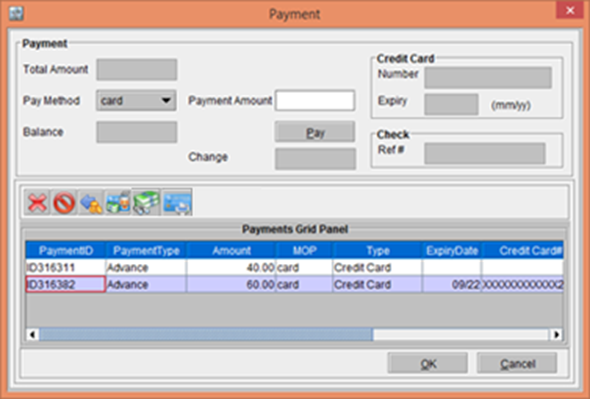
Click OK. The Transaction gets included in the Payment window, as shown in the Figure 12.5.
Figure 12.5 Transaction included in the Payment window
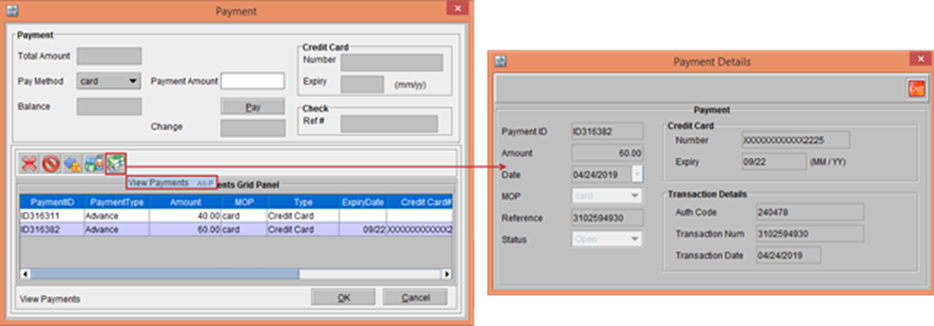
In the Payment window, click the View Payments window. The Payment Details window is displayed with the Credit Card and Transaction Details, as shown in Figure 12.6.
Figure 12.6 Credit Card and Transaction Details included in the Payment window
Exit the Payment Details window.
Click OK in the Payment window.
Exit the Order [ORD-005].