Defining Reason Codes in Cr2
Reference: 22045
(V 02.00.02-00)
Details
In CR2, you can use the Reason code feature in configuration to pre-define the Reasons that can be selected while performing the actions which are listed below :
While marking an order as lost
While Cancelling an Order
While creating a credit/debit memo for the posted order invoice
Generating Full credit for the invoice
Marking asset as Lost
Returning an Order
Generating Lost Quote Report
Steps to define Reason Code:
Access Configuration module.
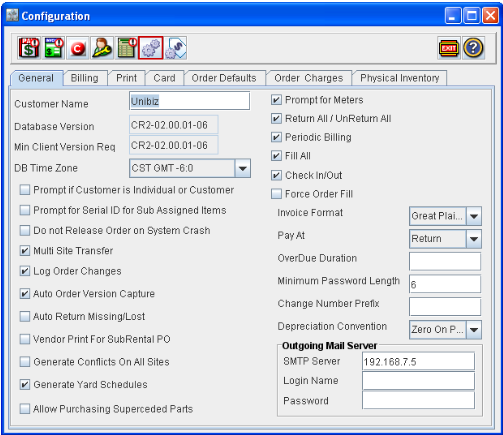
Click on the Reason Code icon (Refer below illustration).
Figure: 1.0
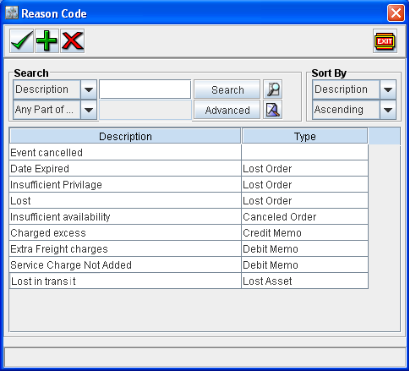
System displays the Reason code window with existing definitions (if any) as shown below :
Figure: 1.1
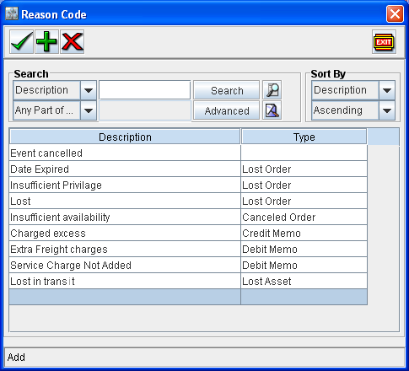
Click on Add icon present
 in the tool bar. A new blank line will be added in the Reason Code window as shown below :
Figure: 1.2
Click inside the Description column and define a description for the definition, which will also be displayed in the Reason code list for selection (Refer illustration below).
Figure: 1.3
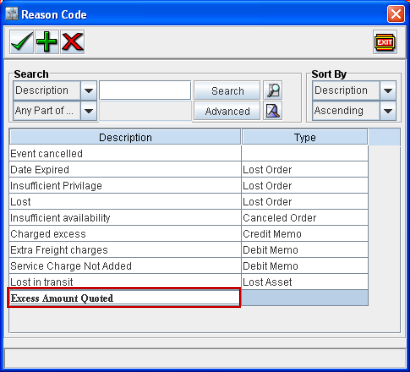
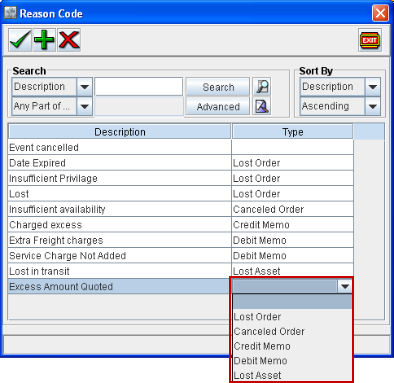
Click inside the Type column to select a type for the Reason code. You can set the type as either Lost Order , Canceled Order, Credit Memo, Debit Memo or Lost Asset.
Figure: 1.4
Notes :
The type field can be used to categorize or to decide when the Reason Codes has to be displayed. For example, if you want to define a Reason that has to be displayed while marking an asset as Lost, the Type value has to be set as LostAsset.
You can also define a reason code with type set as Blank, by which the defined reason code will be displayed for the type of actions for which Reason Code Remarks dialog will be displayed.
Click on OK icon
 , once completed.
Save and exit the configuration module.
Log-off and re-login to the application to make the changes/additions made into effect.
Usage Illustration
Illustration - I Selecting Reason Code
Note : The below illustration is given for selecting Reason / Reason code while marking a Quote Order as Lost. The feature will work as same for other type of actions for which Reason Code dialog will be displayed.
Access / Open any Quote which has to be marked as Lost.
Select the option Lost Order from the Actions Menu in the Order window.
Confirmation prompt will be displayed for marking Order as Lost. Select Yes in the prompt displayed.
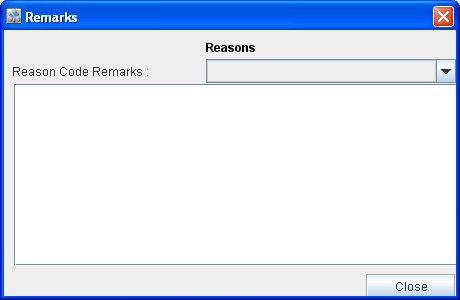
System displays the Reason Code dialog as shown below :
Figure: 2.0
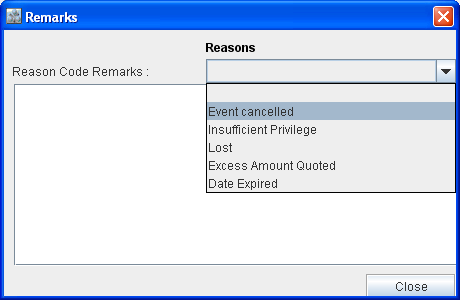
Click on the Reasons drop down field to displays the list of pre-defined reason codes of type Lost order (Refer Illustration below).
Figure: 2.1
Enter the Reason Code Remarks (mandatory) in the Remarks area. Note that, system will not allow you to close the Remarks dialog without entering the Reason Code Remarks.
Click Close.
The Order will be marked as Lost. Save and Exit the Order.
Illustration II - Generating Lost Quote Reports based on Reason Code
Access Reports Module.
Select the option Lost Quote from the Sales menu.
The Report options dialog will be displayed as shown below :
Figure: 3.0
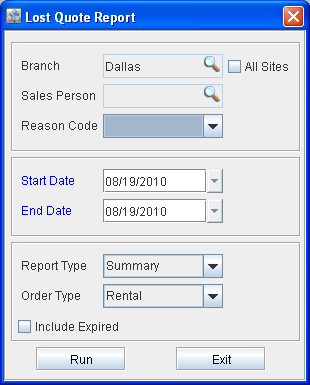
Click inside the Reason code Drop down field to display the list of reason codes as shown below :
Figure: 3.1
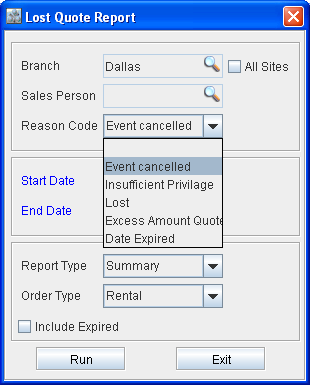
Select the Reason Code based on which the report has to be generated. Note that, on leaving the Reason Code field as blank, system will generate the report including all the lost quotes for which the Reason Code is left as blank (having no reason code selected).
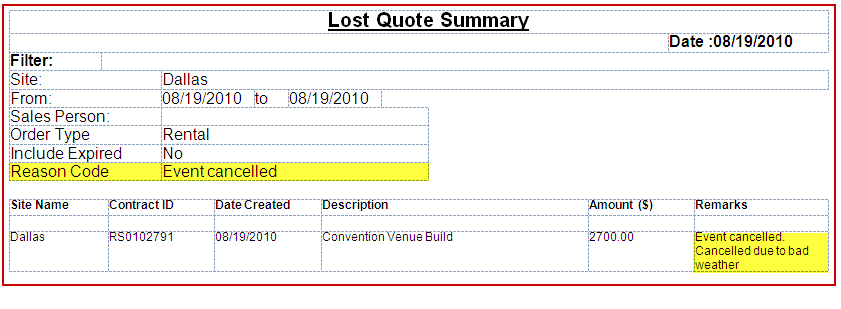
The Report will be generated with the reason code and the remarks entered as shown below :
Figure: 3.2