
Adjusting On Hand Quantities
Reference : 19575
(V 01.00.89-00)
Details
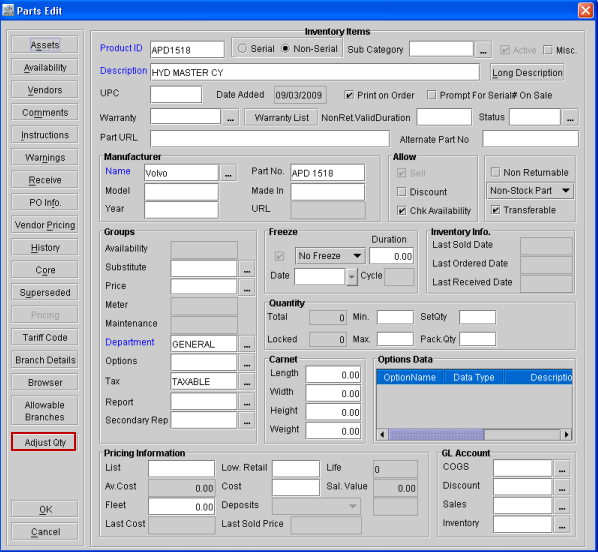
Support has been now provided for the user to adjust the on hand quantity for a part from within the Parts Edit Window. This can be done using the new feature Adjust Qty provided (as shown in Figure 1.0) in the Parts Edit window.
Figure 1.0 Parts Edit Window
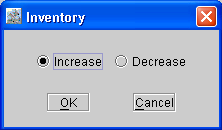
The On Hand Quantity can be adjusted by either Increasing or Decreasing the Quantity. This can be done based on the option selected in the Inventory dialog box which will be displayed on selecting the button "Adjust Qty".
Figure 1.1 Inventory Dialog Box
Increasing stock
On selecting ’Increase’ and clicking ’OK’, system will display the Scan Items window, wherein the user can receive the part quantity by which the stock needs to be increased.
Figure 1.2 Scan Items Dialog Box
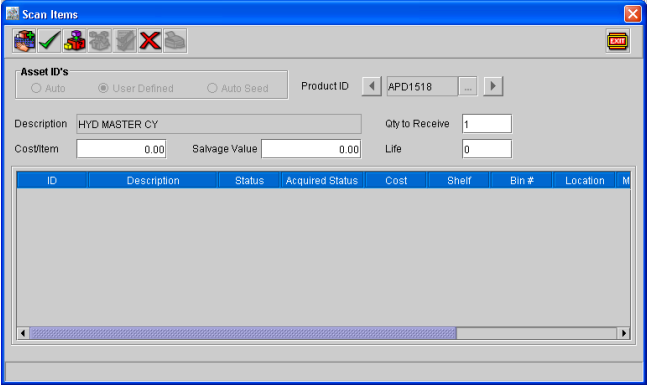
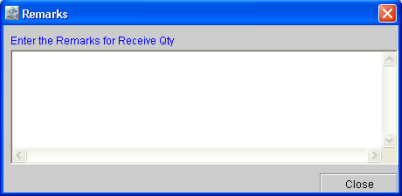
On receiving the part quantity and selecting the Accept Icon to accept the received parts, system will prompt the user to enter remarks which will be linked to the quantity being received. (Note : The comments are mandatory)
Figure 1.3 Remarks Dialog Box
Decreasing Stock
On opting to decrease the on hand quantity, the user will be prompted with the following dialog to enter the quantity by which the stock of the part needs to be reduced.
Figure 1.4 Part Dialog Box
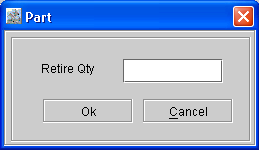
The maximum allowed quantity for this field allowed will be up to the available stock quantity (Not on hand stock).
Once the user enters a quantity and the system validates it, the remarks dialog will appear where the user has to enter the reason for reducing the stock.
Once the quantity adjustments have been made and saved, the user will not be able to cancel the operation. To reverse the action, another increase / decrease need to be done
Cost adjustments in the system will be made with the cost in the receive tiers that system identifies for the quantity adjustment being made.
On Hand Quantity Adjustments in PO Info and Stock Change History
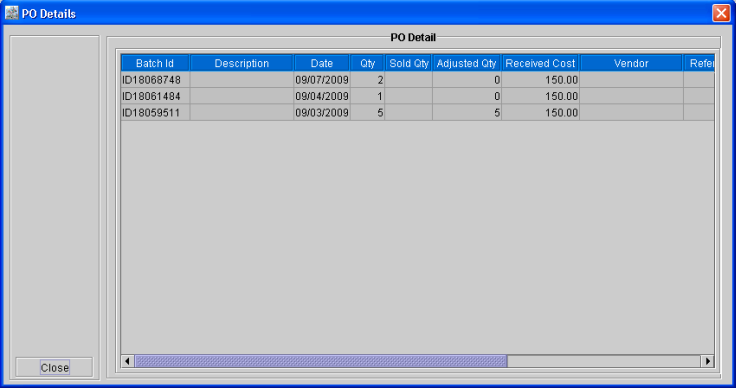
The adjustments made directly to the on hand quantity of a part will appear in the Part change (stock) history window and PO info. The remarks entered while making adjustments will also appear in the part change history screen along with the qty adjustment record.
Figure 1.5 PO Details Window
Accounting On Hand Quantity Adjustments
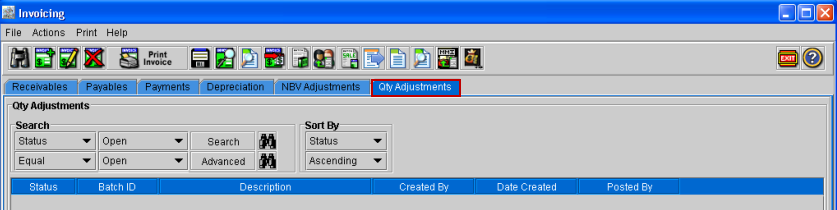
The Accounting for On hand Quantity Adjustments by creating Quantity Adjustment batches from within Invoicing Module for manual adjustments and adjustments made through Physical Inventory. A New batch type "Qty Adjustments" has been now provided in the Invoicing module, using which user can create the On Hand Quantity Adjustment Batches.
Figure 1.6 Qty Adjustments Tab in Invoicing Module Main Window
Creating On Hand Quantity Adjustments Batch
Access Invoicing Module, activate Qty Adjustments Tab
Select the New Icon or select the option File > New from the menu options.
System will create a new Qty Adjustments Batch and open it in the Qty Adjustment window (as shown in Figure 1.7).
Figure 1.7 Qty Adjustments Batch
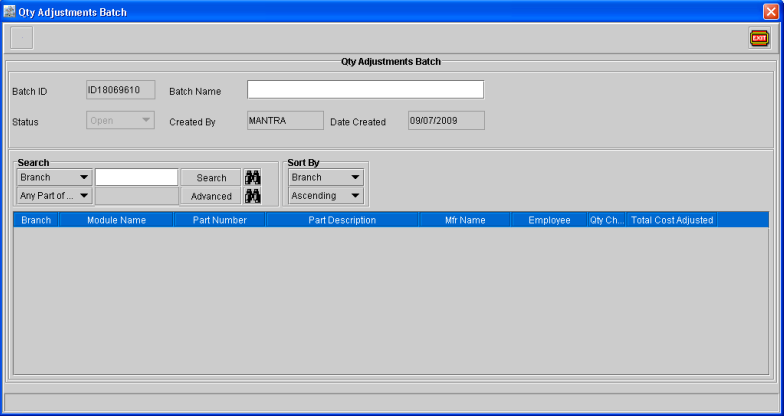
Enter the Batch Description.
Select the Add Un-posted Adjustments icon (illustrated below), to add l insert all Un-Posted manual adjustments and Physical inventory adjustments (from Closed batches) into the batch.
Figure 1.8

Figure 1.9 Qty Adjustments Batch After Un-Posted Qty Adjustments are Added
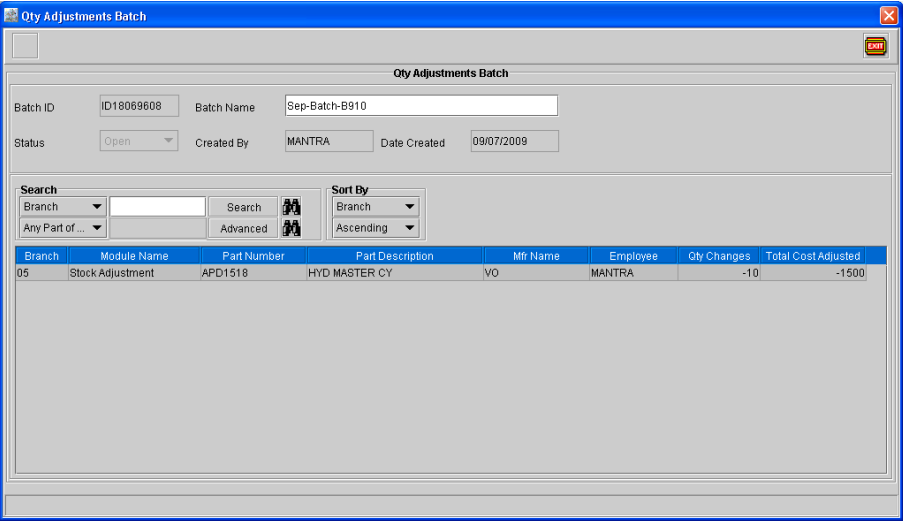
On exiting the batch by selecting the Exit Icon
 , system will prompt for posting the batch as shown below:
Figure 1.10
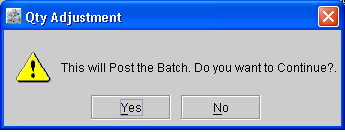
On selecting "Yes", system will display the dialog box (as shown below) where in you can select the path where the Export files for the posted batch has to be copied.
Figure 1.11
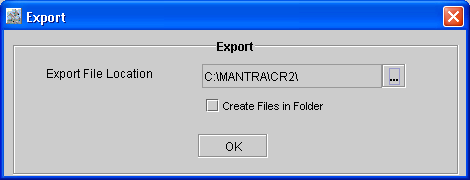
Select OK, to post the batch.
In the Dist.Txt file which will generated on posting the Qty Adjustment batch, system will include the following information as described in Table 1.0.
Table 1.0 Columns within Dist.txt File
Field | Field Position | Description |
Reference ID | 1 | Displays Physical inventory Batch ID (for Qty Adjustments in Physical Inventory) or the Stock Adjustment ID (for manual adjustments) |
Transaction Date | 2 | Displays Physical inventory end date (for Qty Adjustments in Physical Inventory) or the stock adjusted date (for manual adjustments) |
GL Account | 3 | Displays as 1210 for demit and 5300 for credit. |
Source Document | 4 | Blank |
Debit | 5 | Debit Amount
|
Credit | 6 | Credit Amount |
Distribution Ref | 7 | Part number from Physical Inventory (for Qty Adjustments in Physical Inventory) or Stock Adjustment (for manual adjustments) |
Asset ID | 8 | Blank |
Salesman | 9 | Blank |
Manufacturer | 10 | ID of the Part Manufacturer |
Module | 11 | Displays the module from where the adjustments have been made (as either Physical Inventory or Stock Adjustment) |
Points to Note
For positive adjustments, inventory(1210) will be debited and COGS (5300) will be credited.
For Negative adjustments, inventory(1210) will be credited and COGS(5300) will be debited.
Posting register
A posting register will be available for printing from within the Inventory adjustment batch. The fields that are available in the report are:
Branch.
Module Name (Stock Adjustment or Physical Inventory).
Part Number.
Part Description.
Mfr. Name.
Employee who made the change.
Quantity change (+/-).
Average Cost per Piece Adjusted, this will be the [Total Cost Adjusted/Quantity Change].
Total Cost Adjusted (negative values in parentheses).
Report will be sorted by Branch then Module Name.
IDS
In the IDS configuration two new formats "Physical Inventory Batch" and "Stock Adjustment" has been provided using which the user can define IDS for Physical Inventory batch and QTY Adjustments Batch. If any IDS definitions exist for the Physical Inventory , then on creating a new physical inventory batch, system will prompt the user to default the IDS definition for the Batch ID. On selecting "Yes" from the message, the IDS definition will be applied for the Physical Inventory Batch ID.
The IDS defined for the Physical Inventory and Stock Adjustment will be displayed in the dump file generated.
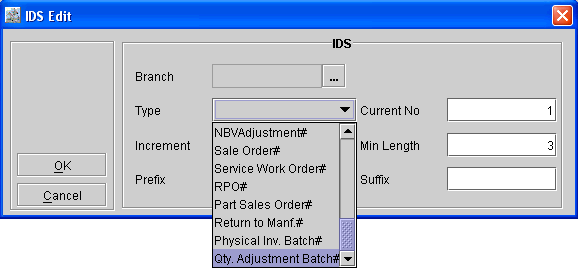
In the IDS Edit window, two new option Physical Inventory Batch# and Qty. Adjustment Batch# has been now provided in the Type drop down list to set the IDs for Physical Inventory Batch and Quantity Adjustment Batch.
Figure 1.12 IDS Edit
In Physical Inventory module, the Physical Inv ID field will not be mandatory.
If the user does not enter any ID in the Physical Inv ID field of the Physical Inventory dialog, system will default the ID from the IDS Edit window.
On creating Quantity Adjustment Batch, system will default the Quantity Adjustment Batch ID as defined in the IDs Edit window.
In the generated dump files, system will displays the Physical Inv Batch ID for Physical Inventory and Quantity Adjustment Batch ID for Quantity Adjustment as Reference ID.
Note: The icon to Export the physical inventory adjustments will not be available with effect to the version 01.00.89-00. The user will be able to export physical inventory adjustment from invoicing- quantity adjustment tab.