
Automatic Shipping of Item(s)
Reference No: 25466
(V 02.00.16-00)
Details
The statuses of Not-Available Items/Parts on various Orders (Rental Reservation, Sales Order, Work Order, and Part Sales) get automatically updated to Sold/Out when the Items/Parts are received from the Purchase Order window.
Configuration Settings
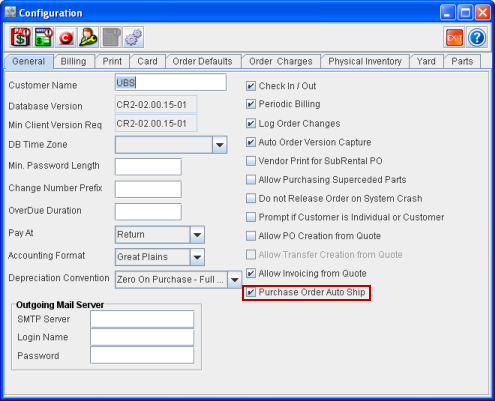
The statuses of Item/Part get automatically updated only if the Purchase Order Auto Ship check box in Configuration > General tab is selected, as shown in Figure 1.0.
Figure 1.0 Purchase Order Auto Ship Check Box Selected in Configuration
Sample Workflow
Select the Purchase Order Auto Ship check box in Configuration module > General tab.
Create a Sale Order [Order#1] from the Account module.
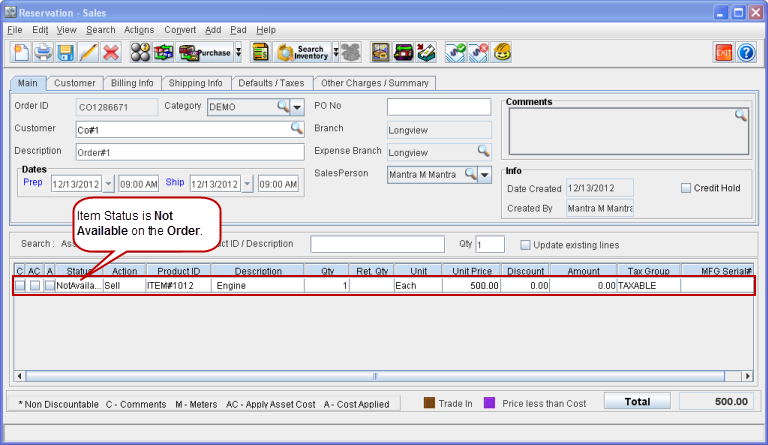
Add an Item, (for example Item#1) which is not in stock. The Item line status is shown as Not Available, as shown in Figure 2.0.
Figure 2.0 Not Available Item on Order
Right-click on the item line and select the option Assign. The Assign dialog box is displayed.
Select the Transfer In/Purchase option and click OK. Assign window is displayed.
Select the Purchase/Sub Rent tab in the Assign window and click on the New icon. A new line is added with Auto Ship check box selected by default from Configuration, as shown in Figure 2.1.
Figure 2.1 Auto Ship Option in Assign Window
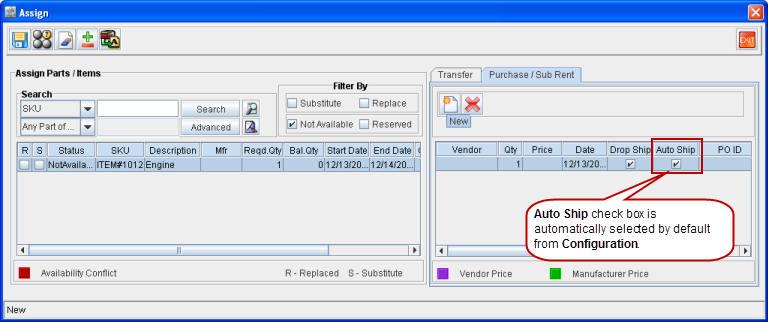
Note: The Auto Ship column is newly added to the Assign Window > Purchase/Sub Rent tab.
Tag a Vendor, save and exit the Assign window. A new Purchase Order [P-Order#1] is created.
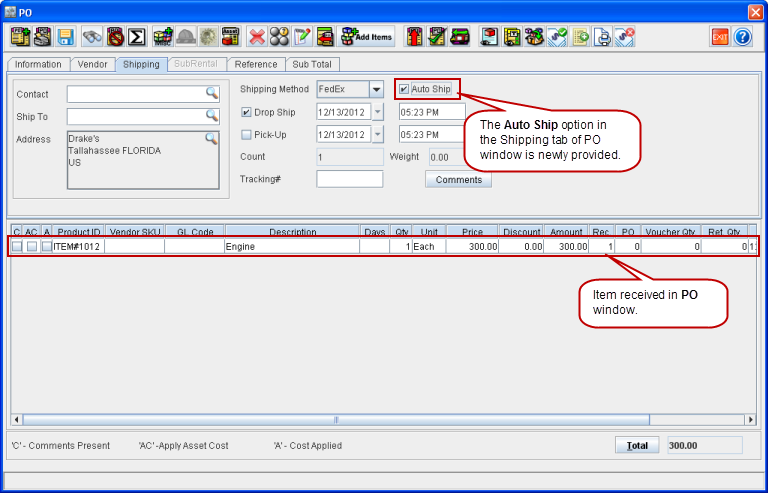
Open the Purchase Order [P-Order#1] and receive the Item [Item#1]. The item gets received, as shown in Figure 2.2.
Figure 2.2 Item Received in PO Window
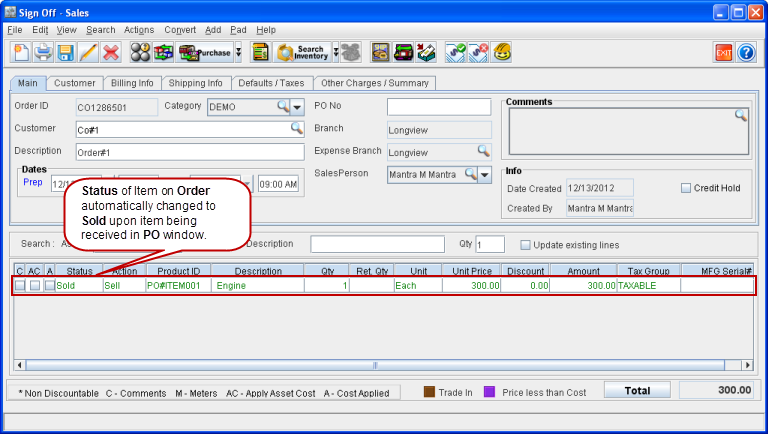
Verify the Status of Item#1 in the Order. The status is automatically updated to Sold, as shown in Figure 2.3.
Figure 2.3 Item Status Automatically Updated to Sold in Order Window
Note: The Auto Ship check box can also be manually selected or cleared from the Assign window or from the Purchase Order window.